使用基于Vmware的Centos7虚拟机搭建Ceph单节点集群

为方便大家快速上手Ceph,我制作了一个基于Vmware的虚拟机,安装了CentOS 7.9系统并完成了一些按照Ceph必须完成的设置,包括关闭了防火墙及SELinux等。你只需要按照本文中的几个步骤就可以轻松的搭建一个扩扩展的单节点Ceph集群。

下载镜像并建立虚拟机

从百度网盘或是移动云盘下载镜像

  1. 百度网盘下载地址
    链接:https://pan.baidu.com/s/1VWqeA1ldpyfJDdNvNCL4xA
    提取码:zj2p

  2. 移动云盘下载地址

链接: https://caiyun.139.com/m/i?0m5CMSWoSKbbB
提取码:4jfx

下载后解压,是ovf格式的虚拟机镜像,在 vmware 中导入,完成后开机并登录

登录用户为: stu
登录密码为: Password.123

接下来就可以开始配置 ceph 单节点集群环境了。

网络设置

设置静态IP

虚拟机默认采用的是桥接网络,为了便于后续的集群扩展,最好设置为静态IP。

登录到系统中,编辑 /etc/sysconfig/network-scripts/ifcfg-ens160

1
sudo vi /etc/sysconfig/network-scripts/ifcfg-ens160

用你实际环境中的信息替换下面的几项网络设置:

1
2
3
IPADDR="192.168.3.92"
NETWORK="255.255.255.0"
GATEWAY="192.168.3.1"

保存文件后重启网络

1
sudo service network restart

修改主机名

我们将集群中的第一台主机的名称设置为: ceph-01, 执行

1
sudo hostnamectl set-hostname ceph-01

修改hosts文件

修改hosts文件,执行:

1
sudo vi /etc/hosts

添加ceph-01到文件中

1
192.168.3.92  ceph-01

注意: 用你实际环境的IP替换上面的192.168.3.92

安全设置

用 ansible 安装 ceph 集群时,需要 ansible 的进程需要能够通过无密码的方式ssh到安装机(基本是单机版本也需要完成这个步骤)。

设置登录密钥

使用ssh-keygen为当前用户(stu)生成ssh key

1
ssh-keygen -t rsa

如果提示已经存在,是否覆盖老的文件,选择”y”, 其它全部使用默认设置,完成后,系统将显示类似如下的信息:

1
2
3
4
5
6
7
8
9
10
11
12
13
14
15
16
17
18
19
20
21
Generating public/private rsa key pair.
Enter file in which to save the key (/home/stu/.ssh/id_rsa):
Created directory '/home/stu/.ssh'.
Enter passphrase (empty for no passphrase):
Enter same passphrase again:
Your identification has been saved in /home/stu/.ssh/id_rsa.
Your public key has been saved in /home/stu/.ssh/id_rsa.pub.
The key fingerprint is:
SHA256:lKE3BBI6eJy2lSkpxfGEn8CjFMMsplZ2HO8bTh3OxDU stu@c-node00
The key's randomart image is:
+---[RSA 2048]----+
|o=+o=oo.o E |
|.OBO *.o.o. . |
|B.%+*...=+ |
|o= =o .o=.. |
|. . +S+ |
| o o |
| o |
| |
| |
+----[SHA256]-----+

将密钥复制到其它节点,包括ceph-01本身(因为在单节点安装中 ceph-01既是部署机也是ceph节点机)。

以复制到 ceph-01 为例,执行

1
ssh-copy-id ceph-01

根据提示输入stu的密码,完成后系统会显示类似如下的信息:

1
2
3
4
5
6
7
8
9
/usr/bin/ssh-copy-id: INFO: Source of key(s) to be installed: "/home/stu/.ssh/id_rsa.pub"
/usr/bin/ssh-copy-id: INFO: attempting to log in with the new key(s), to filter out any that are already installed
/usr/bin/ssh-copy-id: INFO: 1 key(s) remain to be installed -- if you are prompted now it is to install the new keys
stu@ceph-01's password:

Number of key(s) added: 1

Now try logging into the machine, with: "ssh 'ceph-01'"
and check to make sure that only the key(s) you wanted were added.

验证 ssh 能过无密码登录,执行

1
ssh ceph-01

如果能正常登录,得到类似如下的信息:

1
Last login: Sun Dec 11 03:58:03 2022 from 192.168.3.83

注意:验证成功后要执行 exit 命令从 ssh 会话中退出

安装和配置 ceph-ansible

我在虚拟机里面已经准备了 ceph-ansible 的安装文件和一些为搭建单节点集群的配置文件,你不需要再复制文件或是下载文件到虚拟机中。

ceph-ansible 的安装文件就放在 /home/stu 目录中,文件名为 ceph-ansible-4.0.5.tar.gz

解压该文件在当前目录(/home/stu)

1
tar -zxvf ceph-ansible-4.0.45.tar.gz

解压后将目录改名为 ceph-ansible

1
mv ceph-ansible-4.0.45 ceph-ansible

这时执行 ls 命令,你应该看到目录中包含以下5个文件和目录

1
all.yml  ceph-ansible  ceph-ansible-4.0.45.tar.gz  osds.yml  site.yml

接下来,将 site.yml 复制到 ceph-ansible 目录中, all.yml, osds.yml 复制到 ceph-ansible/group_vars 目录中

1
2
3
cp site.yml ceph-ansible
cp all.yml ceph-ansible/group_vars
cp osds.yml ceph-ansible/group_vars

最后,按实际情况修改这些配置文件

首先,进入 ceph-ansible 目录

1
cd ceph-ansible
  1. group_vars/all.yml 文件
1
vi group_vars/all.yml

对于该文件, 需要修改两项: public_network 和 monitor_interface, 找到并替换为下面的内容

1
2
monitor_interface: ens160
public_network: 192.168.3.0/24

注意: 用你的实际网络配置替换 192.168.3.0/24

配置 ansible

编辑 /etc/ansible/hosts 文件,

1
sudo vi /etc/ansible/hosts

添加如下的内容

1
2
3
4
5
6
7
8
9
10
11
[mons]
ceph-01

[osds]
ceph-01

[clients]
ceph-01

[grafana-server]
ceph-01

保存以后,可以运行以下命令进行验证

1
ansible all -m ping

如果得到类似如下的信息,则说明配置正确 ansible 能正常运行

1
2
3
4
5
6
7
ceph-01 | SUCCESS => {
"ansible_facts": {
"discovered_interpreter_python": "/usr/bin/python"
},
"changed": false,
"ping": "pong"
}

部署

按照一个ceph-ansible的python依赖库和软件

执行

1
sudo yum install python-netaddr -y

按照ceph-ansible项目的依赖, 执行前确保在 ceph-ansible 目录中

1
pip install -r requirements.txt

万事俱备,开始部署,执行

1
ansible-playbook -i /etc/ansible/hosts site.yml

根据机器性能和网速的不同,这个过程可能要几分钟到二十分钟左右。 如果看到系统显示类似如下的信息则说明按照成功:

1
2
3
4
5
6
7
8
9
10
11
12
13
14
15
16
17
18
19
20
21
22
23
24
25
26
27
28
29
30
31
32
33
34
35
36
37
38
39
40
41
42
43
44
45
46
47
48
49
50
51
52
53
ok: [ceph-01 -> ceph-01] =>
msg:
- ' cluster:'
- ' id: 371d876a-2a90-44e4-af1e-dcc77d7c0f52'
- ' health: HEALTH_WARN'
- ' mon is allowing insecure global_id reclaim'
- ' '
- ' services:'
- ' mon: 1 daemons, quorum ceph-01 (age 14m)'
- ' mgr: ceph-01(active, since 9s)'
- ' osd: 3 osds: 3 up (since 14m), 3 in (since 38h)'
- ' '
- ' data:'
- ' pools: 0 pools, 0 pgs'
- ' objects: 0 objects, 0 B'
- ' usage: 3.0 GiB used, 27 GiB / 30 GiB avail'
- ' pgs: '
- ' '

PLAY RECAP *************************************************************************************************************
ceph-01 : ok=464 changed=21 unreachable=0 failed=0 skipped=607 rescued=0 ignored=0


INSTALLER STATUS *******************************************************************************************************
Install Ceph Monitor : Complete (0:00:35)
Install Ceph OSD : Complete (0:00:39)
Install Ceph Client : Complete (0:00:23)
Install Ceph Dashboard : Complete (0:00:55)
Install Ceph Grafana : Complete (0:00:44)
Install Ceph Node Exporter : Complete (0:00:21)

Sunday 11 December 2022 11:24:43 +0800 (0:00:00.084) 0:05:54.138 *******
===============================================================================
ceph-infra : install firewalld python binding ------------------------------------------------------------------ 65.21s
ceph-common : configure red hat ceph community repository stable key ------------------------------------------- 11.23s
ceph-grafana : wait for grafana to start ------------------------------------------------------------------------ 5.68s
ceph-dashboard : check if dashboard admin user exists ----------------------------------------------------------- 3.36s
check for python ------------------------------------------------------------------------------------------------ 3.16s
ceph-config : look up for ceph-volume rejected devices ---------------------------------------------------------- 2.48s
ceph-config : look up for ceph-volume rejected devices ---------------------------------------------------------- 2.47s
gather facts ---------------------------------------------------------------------------------------------------- 2.23s
ceph-dashboard : copy self-signed generated certificate on mons ------------------------------------------------- 2.23s
ceph-osd : use ceph-volume lvm batch to create bluestore osds --------------------------------------------------- 2.22s
ceph-config : look up for ceph-volume rejected devices ---------------------------------------------------------- 2.17s
ceph-osd : apply operating system tuning ------------------------------------------------------------------------ 2.15s
ceph-prometheus : ship systemd services ------------------------------------------------------------------------- 2.09s
ceph-dashboard : disable mgr dashboard module (restart) --------------------------------------------------------- 2.05s
ceph-dashboard : enable mgr dashboard module (restart) ---------------------------------------------------------- 2.03s
ceph-dashboard : enable mgr dashboard module (restart) ---------------------------------------------------------- 2.02s
ceph-osd : systemd start osd ------------------------------------------------------------------------------------ 1.85s
ceph-dashboard : update dashboard admin password ---------------------------------------------------------------- 1.73s
ceph-grafana : make sure grafana configuration directories exist ------------------------------------------------ 1.69s
ceph-container-engine : install container packages -------------------------------------------------------------- 1.65s

部署完成后,也可以在本机(非虚拟机)使用浏览器访问安装好的集群的 Dashboard 界面。在浏览器地址栏输入

1
https://<你的虚假机IP>:8443

在登录界面中输入默认的用户名: admin 和密码: p@ssw0rd (这些其实是在 group_vars/all.yml 文件中设置的),就可以看到Dashboard界面了。如图
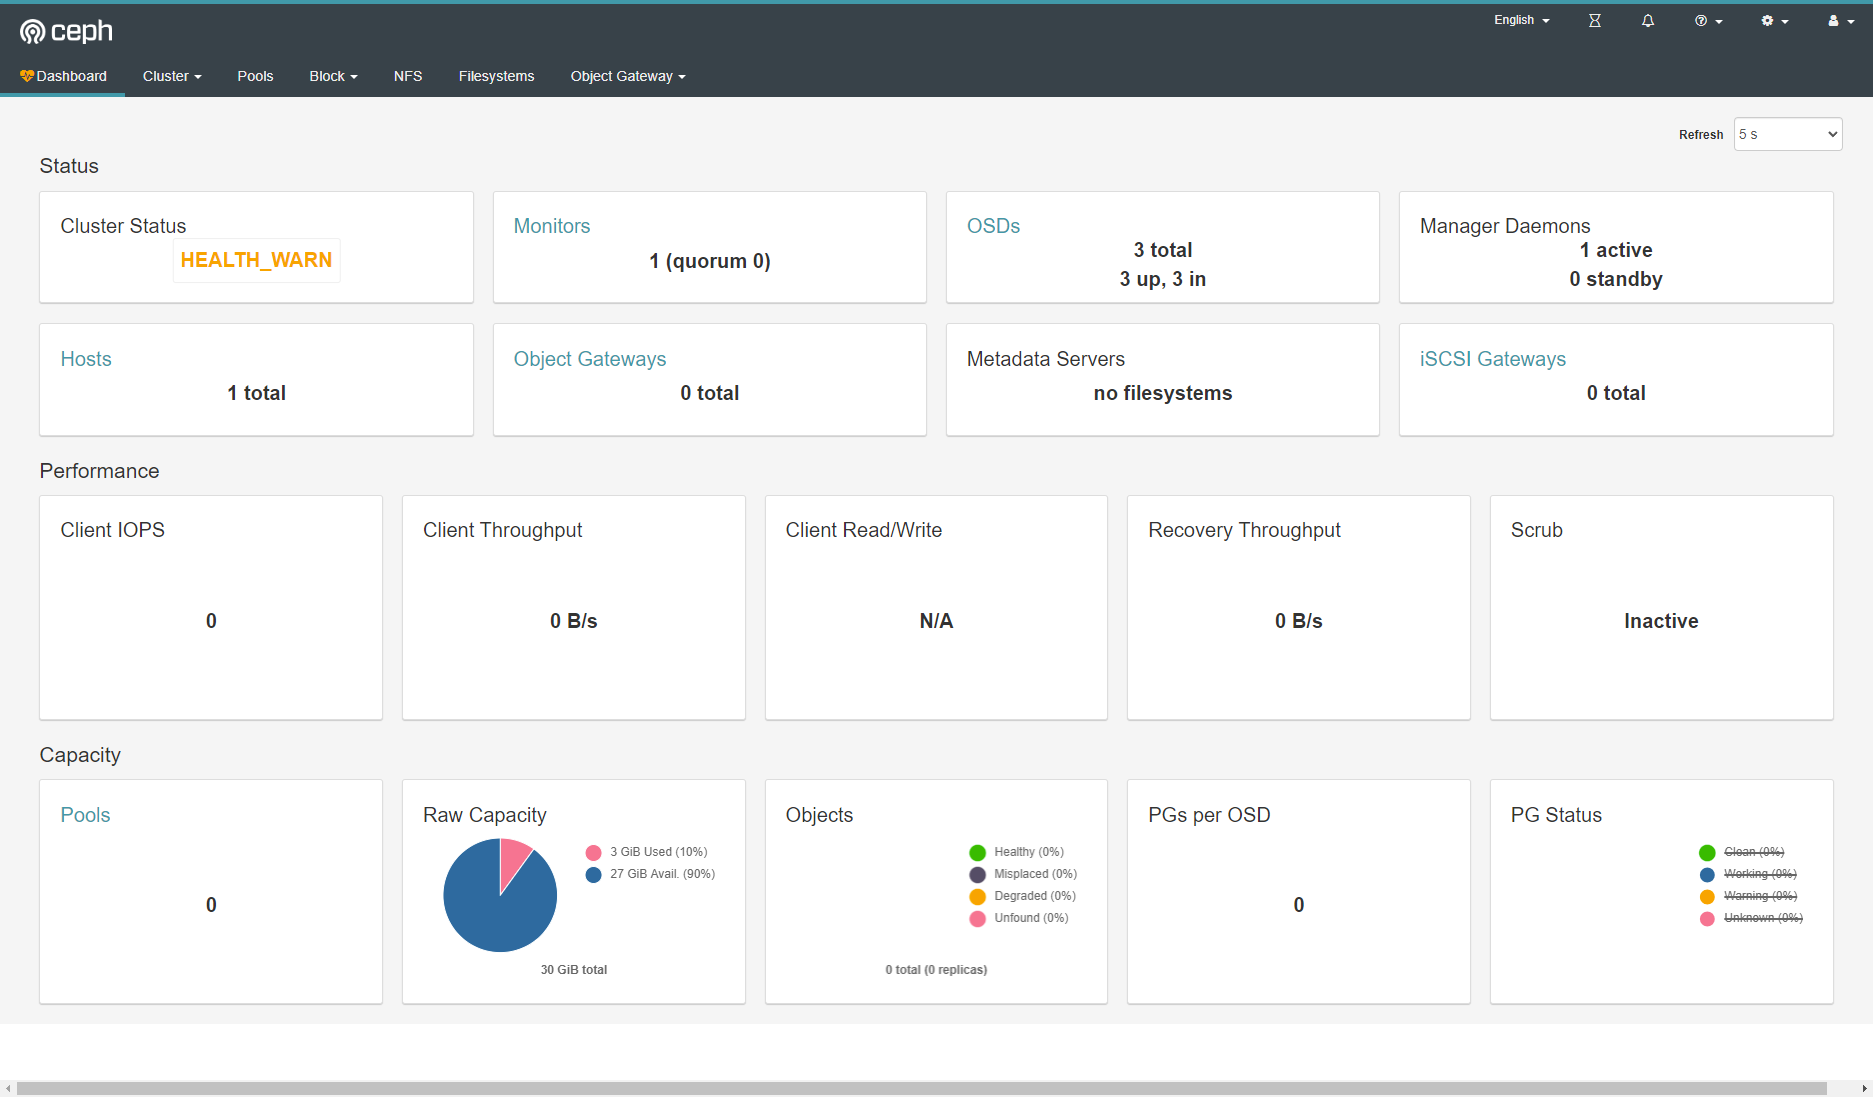
ceph dashboard on single node cluster

可以看到,集群现在存在一个警告: “mon is allowing insecure global_id reclaim”, 在命令行执行 ceph -s 查看集群的状态时,也可以看到同一个警告。

在命令行执行下面的语句消除该警告

1
ceph config set mon auth_allow_insecure_global_id_reclaim false

本文标题:使用基于Vmware的Centos7虚拟机搭建Ceph单节点集群

文章作者:Morning Star

发布时间:2022年12月10日 - 19:12

最后更新:2022年12月11日 - 11:12

原始链接:https://www.mls-tech.info/ceph/ceph-setup-single-node-cluster-on-centos-vmware/

许可协议: 署名-非商业性使用-禁止演绎 4.0 国际 转载请保留原文链接及作者。