使用Vant组件中的外部样式时遇到的一些问题

在微信小程序中使用Vant Weapp时,会看到几乎每个组件都有“外部样式类”这个属性。那如何使用它?使用它的时候又会遇到什么问题呢?本文来给你答案

使用组件的外部样式类

我们以van-button组件作为例子来说明组件外部样式类的使用,假设有一个页面,页面中包含一个button, 目录和文件组成如下:

1
2
3
4
5
6
pages
+ home
home.js
home.json
home.wxml
home.wxss

为了使用van-button, 我们需要在home.json中注册组件

1
2
3
4
5
{
"usingComponents": {
"van-button": "../../vant/button/index"
}
}

然后在home.wxml中加入Button,

1
2
3
<view>
<van-button type="primary" size="large" bindtap='onScan'>扫描商品</van-button>
</view>

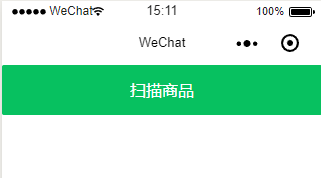
这样我们得到如图的界面:
使用vant组件中的外部样式表

接下来,我们用组件的外部样式类为button中的文字加入删除线。
在home.wxss中加入如下代码

1
2
3
.atten {
text-decoration: line-through;
}

在改变home.wxml中的代码,为van-button组件加入custom-class属性

1
2
3
<view>
<van-button type="primary" size="large" custom-class="atten" bindtap='onScan'>扫描商品</van-button>
</view>

保存以后,我们可以看到界面显示如下图,
使用vant组件中的外部样式表

删除线已经加入到button的文本上,说明外部样式类已经起作用了。

外部样式类无效的情况

在实际使用中,有学员向我反映说使用外部样式类后没有效果。是什么原因呢? 让我们先来看一个例子,在刚才的css类中,我们在加入一个css属性去改变button中字体的颜色。
home.wxss

1
2
3
4
.atten {
text-decoration: line-through;
color: red;
}

设置button中字体的颜色为红色。 现在保存,你可以看到界面和刚才一样,没有发生任何变化。
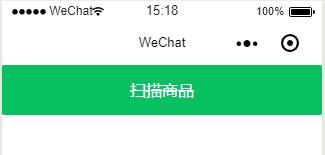
使用vant组件中的外部样式表

为了探求原因,我们打开van-button的源码,可以看到如下的定义:

1
2
3
4
5
6
7
8
9
10
11
12
13
14
15
16
17
18
19
20
21
22
23
24
25
26
27
28
29
30
31
32
33
34
35
36
37
38
...
<button
id="{{ id }}"
class="custom-class {{ utils.bem('button', [type, size, { block, round, plain, square, loading, disabled, hairline, unclickable: disabled || loading }]) }} {{ hairline ? 'van-hairline--surround' : '' }}"
open-type="{{ openType }}"
hover-class="van-button--active hover-class"
lang="{{ lang }}"
business-id="{{ businessId }}"
session-from="{{ sessionFrom }}"
send-message-title="{{ sendMessageTitle }}"
send-message-path="{{ sendMessagePath }}"
send-message-img="{{ sendMessageImg }}"
show-message-card="{{ showMessageCard }}"
app-parameter="{{ appParameter }}"
aria-label="{{ ariaLabel }}"
bindtap="onClick"
bindgetuserinfo="bindGetUserInfo"
bindcontact="bindContact"
bindgetphonenumber="bindGetPhoneNumber"
binderror="bindError"
bindlaunchapp="bindLaunchApp"
bindopensetting="bindOpenSetting"
>
<block wx:if="{{ loading }}">
<van-loading
custom-class="loading-class"
size="{{ loadingSize }}"
color="{{ type === 'default' ? '#c9c9c9' : '' }}"
/>
<view
wx:if="{{ loadingText }}"
class="van-button__loading-text"
>
{{ loadingText }}
</view>
</block>
<slot wx:else />
...

注意:自定义的样式类被排在class属性值的最开始,这就意味着如果后续如果出现相同的CSS属性定义将会覆盖掉自定义类中的定义。
另外,我们可以看到,我们在本例中想控制的文本,其实是在slot中的,所以我们也可以通过把文本放入text标签中,再加CSS的方式来控制。

1
2
3
<view>
<van-button type="primary" size="large" custom-class="atten" bindtap='onScan'><text class='atten'>扫描商品</text></van-button>
</view>

本文标题:使用Vant组件中的外部样式时遇到的一些问题

文章作者:Morning Star

发布时间:2019年06月19日 - 22:06

最后更新:2021年04月16日 - 15:04

原始链接:https://www.mls-tech.info/weapp/weapp-vant-external-class/

许可协议: 署名-非商业性使用-禁止演绎 4.0 国际 转载请保留原文链接及作者。